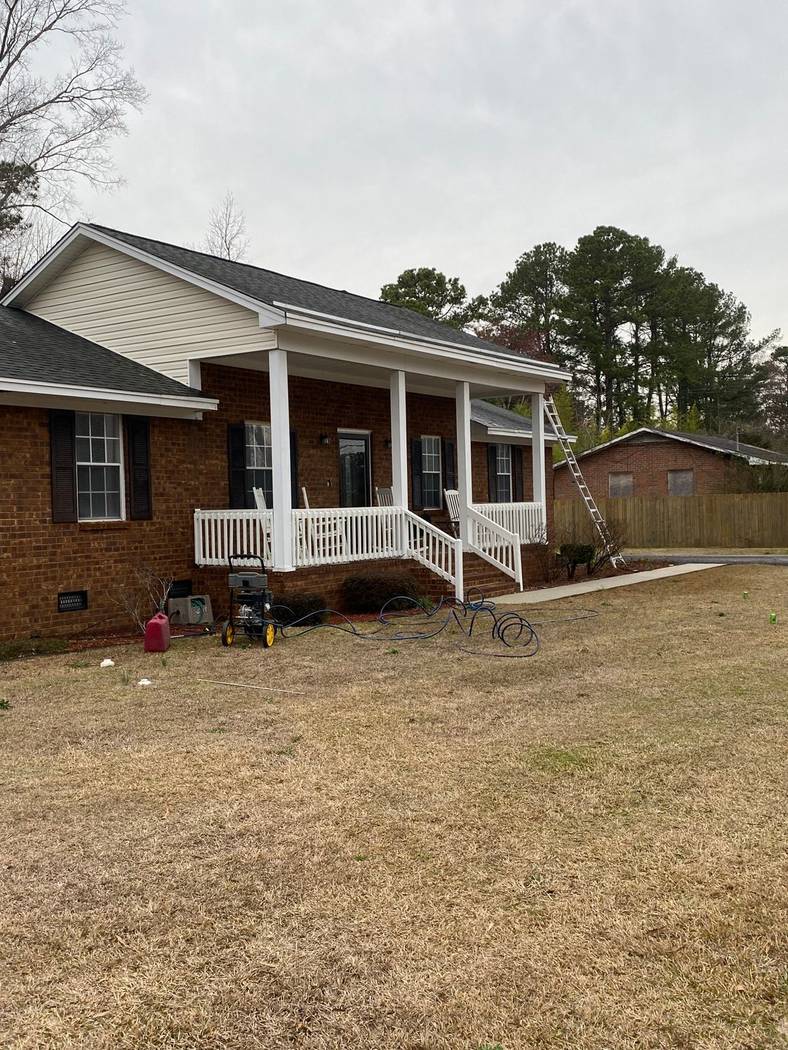
Pressure Washing Brick Home Mud Stains in Bishopville SC: What Actually Works
- Fall rain in the Bishopville area splashes red clay and road debris onto the lower courses of brick, and that material bonds tightly once it dries.
- Dried mud and efflorescence look similar but require different removal approaches, and treating one like the other can damage your brick or leave the stain behind.
- PSI and nozzle angle matter more on brick than on almost any other surface, because the mortar joints are the weak point.
- Pressure washing is often the right prep step before any painting or sealing work on an exterior brick wall.
- Most of the lower-course staining on Bishopville homes is surface contamination, not structural damage, which means it cleans up well when the method matches the material.
#Why Does Fall Rain Cause Mud Stains on Bishopville SC Brick Homes?
Pressure washing brick home mud stains in Bishopville SC starts with understanding why those stains form in the first place. Walk around the base of a brick home in Bishopville after a few good autumn rains and you will likely see it: a reddish-brown film coating the bottom two or three courses of brick, sometimes splattering six inches up from the soil line, sometimes higher if the ground slopes toward the wall. That is not the brick fading. That is the Pee Dee region's red clay soil doing what it does every fall when the rains pick up and the ground is still relatively bare.
Summer foot traffic and lawn activity compact the soil and reduce its ability to absorb rainfall quickly. When a hard fall rain hits, water sheets across the surface instead of soaking in. It picks up loosened clay particles, road dust, and whatever passing traffic has deposited on the roadside or driveway apron, then flings all of it against the lower brick courses at whatever angle the grade allows. By the time the wall dries, that material has essentially baked onto the surface. It is no longer mud in any loose sense. It is a dry, iron-rich deposit that has settled into the texture of the brick face and the edges of the mortar joints.
The reddish staining you see on Bishopville and Lamar, SC area homes is not always the same thing. What looks like a uniform dirt stain up close is often a mix of clay particles, road oil residue, and organic material from decomposing leaves pressed against the wall by splashback. Each component responds a little differently to water pressure and heat.
#Is That Stain Dried Mud or Efflorescence, and Why Does the Difference Matter?
Dried mud and efflorescence are two completely different problems that both show up as a whitish or tan discoloration near the base of a brick wall, and mixing them up is one of the most common mistakes homeowners and less experienced crews make.
Efflorescence is a mineral salt deposit. It forms when water moves through the brick or mortar, pulls dissolved salts along with it, and then evaporates at the surface, leaving the salts behind as a chalky white film. It is coming from inside the wall. Dried mud, road spray, and red clay staining are coming from outside. They sit on top of the surface rather than migrating out of it.
| Factor | Dried Mud / Road Spray | Efflorescence |
|---|---|---|
| Where it comes from | Outside the wall, splashback from soil and road surface | Inside the wall, dissolved salts carried by moisture migration |
| Appearance | Reddish, brown, or tan; often follows splash pattern | Chalky white or gray; often follows mortar joint lines |
| Response to plain water | Softens and releases with adequate pressure and dwell time | Does not dissolve readily; may reappear after washing |
| Primary removal method | Pressure washing with correct PSI and nozzle, pre-soak | Mild acid-based cleaner (dilute muriatic or phosphoric acid) applied carefully, then rinsed |
| Indicates a structural issue? | No, surface contamination only | Possibly, if recurring, it suggests a water intrusion problem |
Getting the diagnosis right before you start washing changes everything. Hitting efflorescence with a pressure washer alone may temporarily lighten it, but it almost always comes back because the source is still active. Dried mud, on the other hand, responds well to pressure washing in South Carolina when the technique is appropriate for brick.
#What PSI and Nozzle Selection Actually Protect Brick Mortar Joints?
Brick itself is fairly hard and tolerates pressure well, but the mortar joints between courses are a different story. Mortar is porous, softer than the surrounding brick face, and subject to erosion if hit with too much pressure at too narrow an angle. Once a mortar joint starts to erode, water gets in behind the wall face, and a cosmetic cleaning problem becomes a structural one.
For dried mud removal on standard residential brick, most experienced operators work in the range of 1,200 to 1,500 PSI using a 25-degree nozzle, which fans the spray wide enough to distribute force across the surface rather than concentrating it on one point. Some situations call for a 40-degree nozzle on particularly soft or older mortar. The Brick Industry Association recommends testing pressure and technique in an inconspicuous area before committing to a full-wall wash, a step that is easy to skip and costly to regret.
Older brick homes from the mid-twentieth century often have softer, lime-based mortar that requires more caution than modern Portland cement mortar. If you are unsure which you have, test in an inconspicuous spot at lower pressure before committing to a full-wall approach.
Angle matters as much as pressure. Spraying perpendicular to the mortar joint, straight into the seam, concentrates force exactly where the wall is weakest. Keeping the wand at an oblique angle to the surface, roughly 45 degrees, cleans the face of the brick without driving water directly into the joint. Pre-soaking the wall before washing is also worth doing. Wet brick absorbs less pressure-driven water into the mortar, and the pre-soak begins to loosen the dried clay so the wash pass does not have to work as hard.
#What Does a Proper Mud Removal Process Look Like Step by Step?
A thorough approach to lower-course brick cleaning on a Bishopville home typically follows this order:
- Wet the entire section with a low-pressure rinse to hydrate the mortar and begin loosening surface clay.
- Apply a brick-safe detergent if the staining is heavy or if road oil is part of the contamination. Let it dwell, but do not let it dry on the surface.
- Wash from the bottom course upward on the detergent pass, then rinse from the top down. This keeps dirty runoff from re-depositing on cleaned areas below.
- Keep the nozzle moving. Dwelling in one spot concentrates pressure and erodes mortar faster than most people expect.
- After rinsing, inspect the mortar joints. If any are crumbling or recessed, note it before the wall gets wet again through rain, because that is now an open water path.
This process handles the vast majority of fall splashback staining. What it does not handle is staining that has penetrated the brick face through years of seasonal cycling. At that point, the conversation shifts from washing to whether a brick-safe chemical treatment or a masonry sealer applied after cleaning makes sense for the long term.
#When Is Pressure Washing Brick Also the Right Prep Step for Painting or Sealing?
Washing is the prep step for painting, and on brick this is especially true. Any masonry paint, elastomeric coating, or water repellent sealer applied over a dirty or muddy surface will fail at the bond line. The clay and road residue sitting on the brick face act as a release layer between the coating and the masonry. It looks fine for a season and then you start seeing peeling, bubbling, or the coating lifting in sheets.
If you are considering having the exterior of a brick home painted, or if you want to apply a clear water repellent to the lower courses to reduce future staining, the cleaning has to come first and the surface has to be fully dry before any coating goes on. The Portland Cement Association notes that masonry surfaces require adequate dry time before coatings are applied to prevent adhesion failure and moisture entrapment, a principle that applies equally to brick walls being prepped for paint or sealer after a pressure washing job. Our exterior painting process accounts for exactly this sequence, whether it is a single-story ranch outside Bishopville or a commercial building facing a parking lot that takes road spray all winter.
#Should You Try This Yourself or Call Someone?
Honest answer: it depends on the age of your mortar. If the home was built in the last thirty years and the mortar joints look tight, a careful homeowner with a consumer-grade pressure washer, the right nozzle, and patience can make a real dent in light splashback staining. Keep the pressure below 1,500 PSI, stay off the narrow nozzles, and do not linger in one spot.
If the home is older, if the mortar is already soft or crumbling in places, or if the staining is heavy and has been on the wall for more than one season, bringing in someone with experience on masonry is worth it. The cost of fixing eroded mortar joints runs well ahead of the cost of a professional cleaning. Serving the Pee Dee since 2014, we have seen what a pressure washer in the wrong hands does to older brick, and it is not a quick fix.
The lower courses of brick on a home in the Bishopville or Lamar, SC area take the worst of the fall road spray season. Getting them cleaned properly before winter sets in means the staining does not have another wet season to bond deeper into the surface.
#Common Questions
Will pressure washing remove all of the red clay staining from my brick?
Most fresh-to-moderate red clay splashback cleans up well with the right pressure, nozzle, and a pre-soak or mild detergent. Staining that has gone through multiple wet-dry cycles over several years may lighten significantly without fully disappearing, because iron-rich clay can slowly work into the pores of the brick face. In those cases, a brick-safe chemical treatment applied after the wash often gets the rest of the way there.
Can pressure washing damage the mortar joints on my brick home?
Yes, it can, and that is the main risk that makes technique matter on masonry work. Mortar is softer than brick, and a narrow nozzle or too much pressure aimed directly into the joint will erode it over time. Using a 25-degree or wider nozzle, keeping the wand moving, and staying at an oblique angle to the wall face rather than spraying straight into the joints reduces that risk considerably.
How is efflorescence different from mud staining, and does pressure washing fix both?
Efflorescence is a mineral salt deposit that comes from inside the wall as moisture migrates outward and evaporates. Mud and road spray are external deposits sitting on the surface. Pressure washing handles external mud well. Efflorescence usually requires a dilute acid-based cleaner to break down the salt deposits, and if it keeps coming back after cleaning, the underlying moisture source needs attention before the cosmetic fix will hold.
How long should I wait after pressure washing brick before applying paint or sealer?
Brick needs to be fully dry before any coating goes on. In fall conditions in the Bishopville area, that typically means waiting at least 24 to 48 hours after washing under dry, mild conditions, and longer if temperatures are cool or the wall stays in shade. Trapping moisture under a paint or sealer film is a common cause of coating failure on masonry, so patience here pays off in how long the finish lasts.
If the base of your brick home is carrying a season's worth of red clay and road spray, we are happy to take a look and talk through what the job involves. Give Make It Happen Pressure Washing a call and we will give you a straight answer on what will and will not come off, and what approach makes sense for your wall.